Connecting a smart board to a computer transforms how we present information, collaborate on projects, and engage with digital content. Whether you’re setting up a classroom, conference room, or training center, understanding the connection process ensures you can start working productively right away. This comprehensive guide walks you through every step of connecting your smart board to a computer, troubleshooting common issues, and optimizing your setup for the best performance.
Understanding Smart Board Connection Types
Before connecting your smart board to a computer, it’s important to identify which connection types your devices support. Modern smart boards typically offer multiple connectivity options, and choosing the right one depends on your equipment, room layout, and intended use.
HDMI Connection
HDMI (High-Definition Multimedia Interface) is the most common connection method for smart boards today. This single cable carries both high-definition video and audio signals, making it the simplest option for most users. HDMI connections support resolutions up to 4K, ensuring crisp, clear display quality for presentations, videos, and interactive content.
To connect via HDMI, locate the HDMI port on both your computer and smart board. These ports are typically rectangular with a tapered bottom edge. Simply plug one end of the HDMI cable into your computer’s HDMI output and the other end into one of the HDMI input ports on your smart board. Most smart boards have multiple HDMI inputs, allowing you to connect several devices simultaneously.
USB Connection
USB connectivity serves two primary functions when connecting a smart board to a computer. First, it enables touch functionality, allowing the computer to recognize and respond to touch inputs on the smart board surface. Second, USB connections can provide power to certain smart board components and facilitate data transfer for interactive features.
Standard USB Type-A to Type-B cables are commonly used for this purpose. Connect the Type-B end (square-shaped) to the smart board and the Type-A end (rectangular) to your computer. Some newer models support USB-C connections, which offer faster data transfer rates and can potentially handle video signals as well.
Wireless Connection Options
Wireless connectivity has become increasingly popular for smart board setups, offering flexibility and reducing cable clutter. Most modern smart boards support screen mirroring protocols like Miracast, AirPlay, or proprietary wireless systems. These allow you to transmit your computer screen to the smart board without physical cables.
To establish a wireless connection, ensure both your computer and smart board are connected to the same Wi-Fi network. Access the screen sharing or casting feature on your computer (usually found in display settings), select your smart board from the available devices, and follow the pairing instructions. Keep in mind that wireless connections may introduce slight latency, which can affect real-time interactive applications.
Step-by-Step Connection Process
Following a systematic approach ensures a successful connection between your smart board and computer. This process applies to most smart board models, though specific steps may vary slightly depending on your manufacturer.
Physical Setup and Cable Management
Begin by positioning your smart board and computer appropriately. If you’re using a wall-mounted smart board, ensure it’s securely installed at a comfortable viewing and interaction height. For mobile smart boards on stands, position the unit on a stable, level surface with adequate clearance around it.
Route your cables carefully to avoid tripping hazards and unnecessary strain on ports. If possible, use cable management systems like conduits, cable trays, or adhesive clips to keep connections organized and protected. Leave some slack in the cables to allow for minor adjustments without disconnecting.
Making the Physical Connections
- Power on your smart board by connecting it to a power outlet and pressing the power button. Wait for the startup sequence to complete, which typically takes 30-60 seconds.
- Connect the HDMI cable from your computer’s HDMI output port to an available HDMI input on the smart board. Note which HDMI input number you’re using (HDMI 1, HDMI 2, etc.), as you’ll need to select this source on the smart board.
- Connect the USB cable from your computer to the smart board’s USB port. This enables touch functionality. Your computer should automatically detect the smart board as a touch input device.
- Power on your computer and wait for it to fully boot up if it wasn’t already running.
- Select the correct input source on your smart board using the remote control or on-screen menu. Navigate to the HDMI input number you connected to.
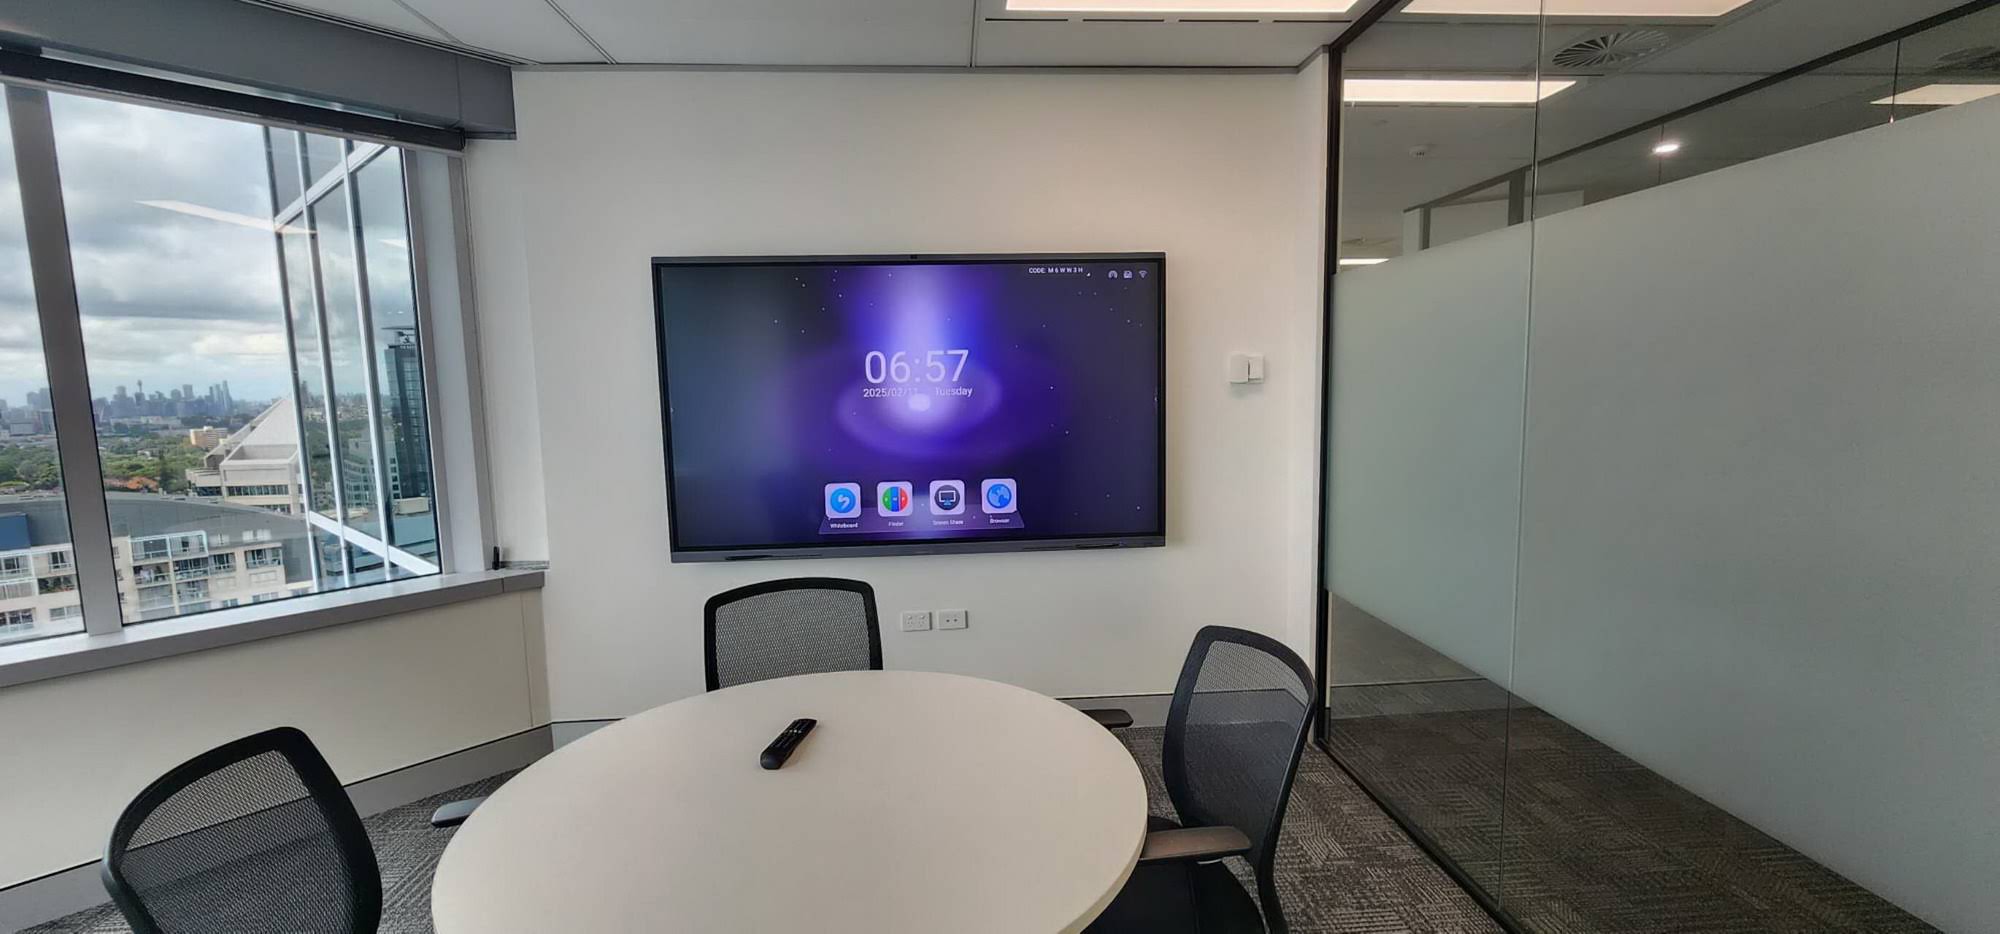
Within a few seconds, your computer screen should appear on the smart board. If you’re using Windows, you may see a notification indicating that a new display has been detected. macOS users will typically see the display recognized automatically in System Preferences under Displays.
Configuring Display Settings
After establishing the physical connection, configure your computer’s display settings to optimize how content appears on your smart board.
For Windows 10 and 11:
- Right-click on the desktop and select “Display settings”
- Scroll down to the “Multiple displays” section
- Choose your preferred display mode: Duplicate (same content on both screens), Extend (smart board acts as a second monitor), or Second screen only (only the smart board displays content)
- Adjust the resolution to match your smart board’s native resolution for the sharpest image quality
- If needed, rearrange the display positions by dragging the numbered rectangles to match your physical setup
For macOS:
- Open System Preferences and click on “Displays”
- Click the “Arrangement” tab to configure multiple display behavior
- Check “Mirror Displays” to show the same content on both screens, or leave it unchecked to extend your desktop
- Drag the menu bar to the display you want to use as your primary screen
- In the “Display” tab, select the optimal resolution for your smart board
Optimizing Touch Functionality
One of the key advantages of smart boards is their interactive touch capability. Proper calibration ensures accurate touch recognition and a smooth user experience.
Touch Calibration Process
Most smart boards require initial touch calibration to align the touch sensors with the displayed image accurately. This process varies by manufacturer, but the general principle remains consistent.
Access your smart board’s calibration utility, typically found in the smart board software that you install on your computer. The calibration process usually involves touching specific targets that appear on the screen in sequence. Follow the on-screen instructions carefully, touching each target at its center point with your finger or the provided stylus.
Complete calibration might require touching 4 to 20 points depending on the calibration method used. Higher numbers of calibration points generally result in more accurate touch recognition, particularly near the edges of the screen. After completing calibration, test the accuracy by drawing or writing on the smart board surface.
Installing Necessary Drivers and Software
For full functionality, install the manufacturer-provided drivers and software for your specific smart board model. These drivers enable advanced features like multi-touch gestures, palm rejection, stylus pressure sensitivity, and proprietary annotation tools.
Download the latest drivers from the manufacturer’s website, ensuring you select the correct version for your operating system. Run the installer and follow the prompts. After installation, restart your computer to ensure all drivers load properly. Once restarted, open the smart board software to access interactive features, whiteboard applications, and additional configuration options.
| Operating System | Driver Installation Location | Typical File Size |
|---|---|---|
| Windows 10/11 | Device Manager > Human Interface Devices | 50-200 MB |
| macOS | System Preferences > Security & Privacy | 40-150 MB |
| Chrome OS | Usually automatic via USB HID protocol | No installation needed |
| Linux | Varies by distribution; check manufacturer documentation | 30-120 MB |
Troubleshooting Common Connection Issues
Even with careful setup, connection problems can occasionally occur. Understanding common issues and their solutions helps you resolve problems quickly and minimize downtime.
No Display on Smart Board
If your smart board powers on but shows no image from your computer, systematically check the following:
- Verify the HDMI cable is firmly connected at both ends
- Confirm you’ve selected the correct input source on the smart board
- Test the HDMI cable with another device to rule out cable failure
- Try a different HDMI port on the smart board if multiple ports are available
- Check your computer’s display settings to ensure it’s set to extend or duplicate displays
- Restart both the computer and smart board
In some cases, particularly with laptops, you may need to press a function key combination (typically Fn + F4, F5, or F8) to activate the external display output. Refer to your computer’s documentation for the specific key combination.
Touch Functionality Not Working
If the display works but touch input is unresponsive, the issue typically relates to the USB connection or driver installation:
- Check that the USB cable is securely connected to both devices
- Try connecting the USB cable to a different USB port on your computer
- Open Device Manager (Windows) or System Information (macOS) to verify the smart board is recognized as a USB device
- Reinstall or update the smart board drivers
- Recalibrate the touch functionality using the manufacturer’s software
- Ensure no other touch screen devices are conflicting with the smart board
According to industry data, approximately 70% of touch functionality issues are resolved by simply reconnecting the USB cable or updating drivers. If problems persist after these steps, contact the manufacturer’s technical support for advanced troubleshooting.
Audio Not Playing Through Smart Board Speakers
Many smart boards include built-in speakers, and HDMI connections should automatically route audio to them. If you’re not hearing sound:
- Check the smart board’s volume level and ensure it’s not muted
- In Windows, right-click the speaker icon in the system tray, select “Playback devices,” and set the smart board as the default audio device
- In macOS, go to System Preferences > Sound > Output and select the smart board
- Verify the HDMI cable supports audio transmission (all modern HDMI cables do, but older or damaged cables may not)
- Test audio with a different application to rule out software-specific issues
Advanced Configuration Options
Once your basic connection is established and working properly, explore advanced configuration options to enhance your smart board experience.
Multi-Device Setup
Smart boards with multiple HDMI inputs can connect to several computers simultaneously. This is particularly useful in collaborative environments where different team members need to share content.
Connect each computer to a separate HDMI input on the smart board. Assign each input a descriptive name using the smart board’s settings menu (e.g., “Presenter Laptop,” “Conference PC,” “Guest Device”). Switch between inputs using the smart board’s remote control or on-screen menu. Some advanced smart boards support picture-in-picture or split-screen modes, allowing you to display content from multiple sources simultaneously.
Network Integration
Connecting your smart board to your network unlocks additional capabilities like remote management, content sharing, and software updates. Connect an Ethernet cable from your network switch to the smart board’s Ethernet port, or configure the built-in Wi-Fi through the smart board’s settings menu.
Once connected, access the smart board’s web interface by entering its IP address in a web browser. This interface typically allows you to configure network settings, update firmware, manage connected devices, and access usage statistics. Network integration also enables features like wireless screen sharing from mobile devices and cloud-based content storage.
Integrating with Video Conferencing Systems
Smart boards work excellently with video conferencing platforms like Zoom, Microsoft Teams, and Google Meet. To optimize your setup for video conferencing:
- Position a webcam above or below the smart board, aimed at the presentation area
- Connect a high-quality microphone or speakerphone to your computer for clear audio
- Use the smart board’s annotation tools during calls to highlight important information
- Enable screen sharing in your conferencing software to broadcast the smart board content to remote participants
- Consider dedicating one computer specifically to video conferencing while using another for the smart board content
Maintaining Your Connection for Reliability
Proper maintenance ensures your smart board connection remains stable and reliable over time.
Cable Care and Management
HDMI and USB cables can degrade with repeated connecting and disconnecting, or from excessive bending. Avoid wrapping cables too tightly, and use cable ties or Velcro straps instead of twist ties, which can damage the internal wires. When disconnecting cables, grip the connector itself rather than pulling on the cable. For permanent installations, secure cables to prevent accidental disconnection.
Regular Software Updates
Manufacturers regularly release firmware updates for smart boards and driver updates for computers. These updates often include bug fixes, performance improvements, and new features. Check for updates monthly by visiting the manufacturer’s website or using the built-in update function in the smart board software. Always read the release notes before updating to understand what changes are included.
Cleaning and Physical Maintenance
Keep the smart board surface clean to maintain optimal touch responsiveness. Use a microfiber cloth with water or screen-safe cleaning solution to remove fingerprints and smudges. Avoid ammonia-based cleaners, which can damage the touch-sensitive coating. Clean the screen weekly in high-use environments or whenever visibility is affected.
Periodically inspect connection ports for dust, debris, or physical damage. Use compressed air to remove dust from ports, but never insert objects into ports to clean them. If ports appear damaged, contact professional service rather than attempting repairs.
Choosing the Right Smart Board for Your Needs
If you’re in the process of selecting a smart board for your organization, consider these factors to ensure compatibility with your computers and infrastructure:
Screen Size and Resolution
Smart boards range from 55 inches to 98 inches diagonally. Choose a size appropriate for your room dimensions and viewing distance. A resolution of at least 4K (3840 ¡Á 2160) ensures sharp text and images, which is particularly important for detailed presentations or collaborative work. Larger screens benefit from higher resolutions to maintain pixel density.
Touch Technology
Different smart boards use various touch technologies: infrared, capacitive, or resistive. Infrared touch supports up to 20 simultaneous touch points and works with any object, making it ideal for collaborative environments. Capacitive touch provides smartphone-like responsiveness but typically supports fewer simultaneous touches. Consider how many people will interact with the smart board simultaneously.
Connectivity Options
Ensure the smart board offers the connection types your organization uses. Multiple HDMI inputs allow connecting several devices. USB-C ports with DisplayPort Alternate Mode enable single-cable connections from modern laptops. Wireless screen sharing reduces cable clutter but requires a robust Wi-Fi network. Built-in computing (Android or Windows) can reduce the need for external computers.
Software Ecosystem
Evaluate the included software and its compatibility with your existing tools. Some smart boards come with proprietary whiteboarding and collaboration software, while others work with third-party applications. Ensure the software supports the file formats and integrations your organization requires. Companies like Leaderhub, with over 16 years of experience in interactive display technology, provide comprehensive software ecosystems designed to work seamlessly across their product lines, serving customers in more than 82 countries.
Real-World Applications and Use Cases
Understanding how organizations successfully implement smart boards can provide valuable insights for your own setup.
Educational Settings
In classrooms, teachers connect laptops or desktop computers to smart boards to deliver interactive lessons. Science teachers annotate diagrams directly on the board, mathematics instructors solve problems step-by-step with colored markup, and language teachers play videos with interactive subtitles. Students take turns interacting with educational software, fostering engagement and participation.
One elementary school reported that after implementing smart boards in all classrooms, student engagement increased by 35% according to teacher observations, and test scores showed modest but consistent improvements across multiple subjects.
Corporate Environments
Businesses use smart boards in conference rooms for presentations, brainstorming sessions, and client meetings. Sales teams display product demonstrations, project managers update Gantt charts collaboratively, and executives review financial data with real-time annotations. The ability to save and share annotated content after meetings ensures that ideas and decisions are documented.
A marketing agency shared that introducing smart boards to their conference rooms reduced meeting times by an average of 15 minutes because participants could interact directly with presented content rather than requesting changes through the presenter.
Healthcare Facilities
Hospitals and clinics connect smart boards in training rooms, consultation areas, and surgical planning spaces. Medical professionals review patient scans, annotate anatomical diagrams during consultations, and conduct training sessions on new procedures. The large format and interactive capability improve communication between medical staff and patients.
Future-Proofing Your Smart Board Investment
Technology evolves rapidly, but thoughtful choices can extend the useful life of your smart board setup.
Scalability Considerations
When setting up your smart board, consider future expansion. Will you add more smart boards in adjacent rooms? If so, implement consistent connection standards and software across all locations. Consider centralized management systems that allow IT staff to monitor and maintain multiple smart boards from a single interface.
Compatibility with Emerging Standards
New connection standards like HDMI 2.1 support higher resolutions and refresh rates. USB4 combines data, video, and power delivery in a single connection. While not essential today, choosing equipment with these newer standards provides flexibility as computers and other devices adopt them. Ensure your smart board firmware can be updated to support new features as they become available.
Sustainability and Energy Efficiency
Smart boards consume significant power, particularly larger models. Look for units with energy-saving modes that reduce power consumption when not actively in use. Schedule automatic shutdown during non-business hours to reduce energy costs. Some modern smart boards include sensors that detect room occupancy and adjust power consumption accordingly.
Conclusion
Connecting a smart board to a computer is a straightforward process that opens up powerful possibilities for collaboration, presentation, and interactive learning. By following the steps outlined in this guide¡ªfrom understanding connection types and making physical connections to configuring software and troubleshooting issues¡ªyou can establish a reliable, high-performance smart board setup.
Remember that successful implementation goes beyond the initial connection. Regular maintenance, software updates, and user training ensure that your smart board continues to deliver value over its lifetime. Whether you’re enhancing a classroom, upgrading a conference room, or creating a collaborative workspace, a properly connected and configured smart board becomes an indispensable tool for communication and productivity.
As you become more comfortable with your smart board, explore advanced features like wireless connectivity, cloud integration, and multi-user collaboration tools. These capabilities transform the smart board from a simple display into a central hub for digital interaction and teamwork. With the right setup and ongoing optimization, your smart board will serve as a powerful platform for sharing ideas, solving problems, and bringing people together¡ªwhether they’re in the same room or connecting from around the world.